


Using Omni CMS
Omni CMS by Modern Campus, previously named OU Campus, is the Content Management System (CMS) used by UHCL's public website. Omni CMS contains templates that offer flexibility within UHCL branding and best practices for the web.
Web Editors
Departments and offices with frequent web updates typically assign a web editor. All web editors must attend a web editor training before receiving access to edit their web pages. To request web editor training, please submit your request through the UHCL Web Editor Training and Access Request form. To continue as a web editor, you will also attend web editor sessions to keep up with new web practices and resources.
Omni CMS and Web Editing Resources
We have provided some screenshots and videos to help with navigating UHCL's Omni CMS web environment. Please note that different tools are available to users at different levels. If you need to use a tool not available to you, submit a work request for assistance.
Omni CMS by Modern Campus, formerly OU Campus, training materials below are still correct, just with the old OU Campus name and color scheme.
Logging In
Log in at the main UHCL Omni CMS login page to go directly to your dashboard. Omni uses the same UHCL system login credentials as your computer, email, and other UHCL services. Never share your login with another user.
To log in directly on a specific page, you can log in through the © symbol at the bottom of that page. If you attempt to log in via a page you don't have editing access for, you will receive an error message.
Finding Pages
Omni CMS offers multiple ways to navigate and find pages within the system.
Modern Campus Support: Omni CMS - Interface
Editing Pages
Modern Campus Support: Omni CMS - Edit Pages
Some tools visible in the videos and screenshots, such as "Source Code" and "Parameters," may not be available to you as a web editor.
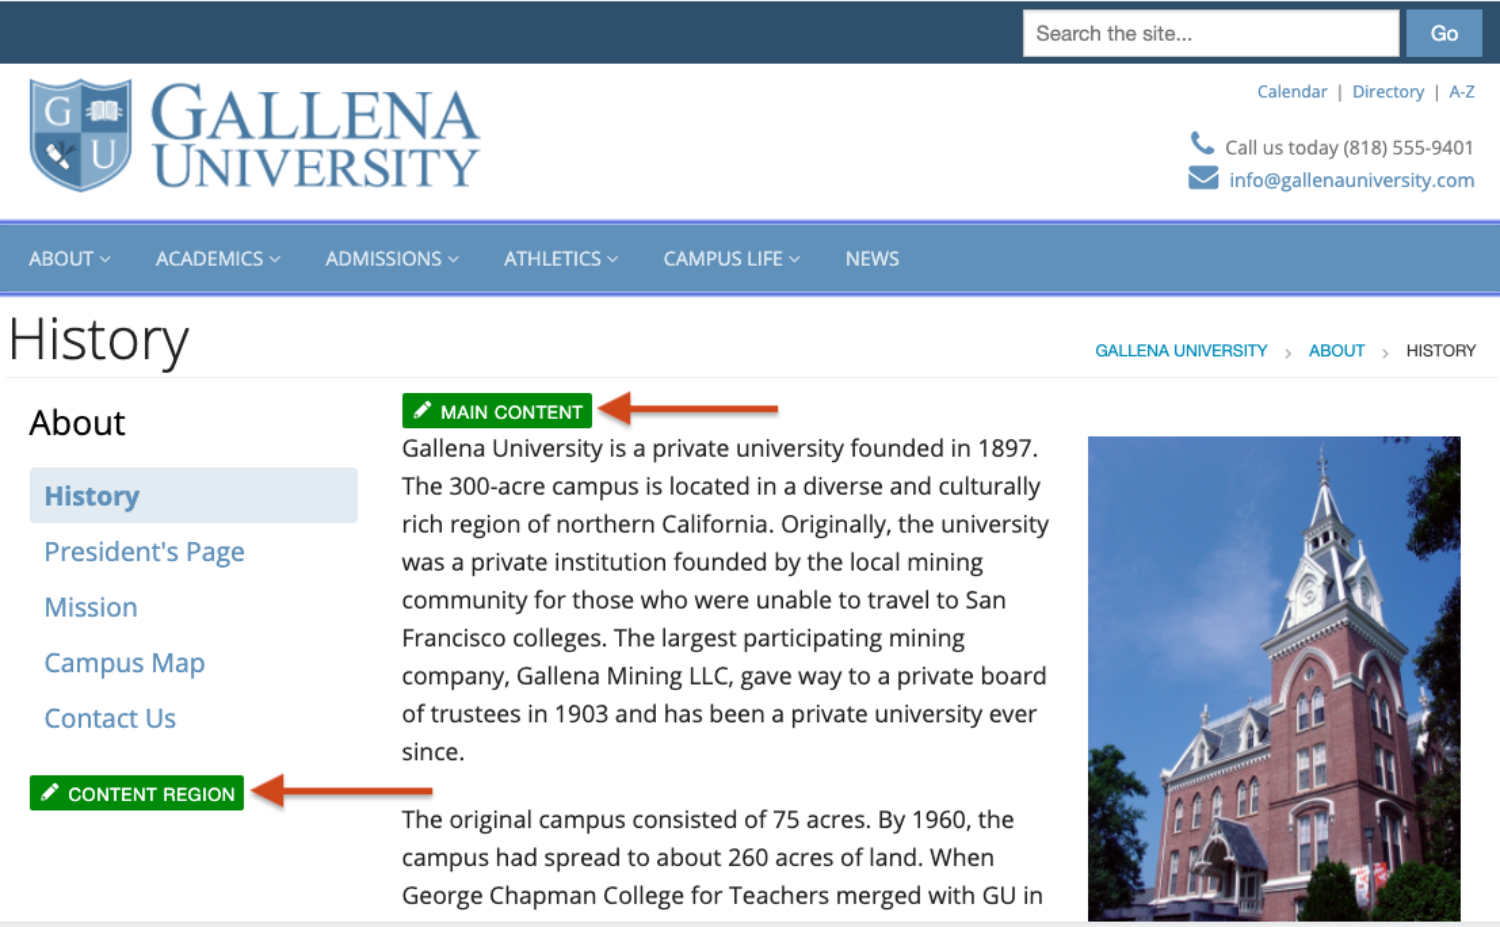
Web editors can only make changes to the "editable regions" of any given page. Any areas of the page that are not editable by you are maintained by WebComm.
Checking Pages Out and In
When you edit a page, the page becomes "checked out" to you. A yellow light bulb icon indicates when a page is checked out to you.
It is important to save and "check in" any pages you are not actively working on so others can edit the page as needed. Check in a page by clicking the yellow light bulb, turning it white. You can also check pages in from your dashboard.
Modern Campus Support: Omni CMS - Pages and Files
Omni CMS Tools
WYSIWYG Editor
Your toolbar may look slightly different from the below video. Different tools are available based on your user level and whether you have attended advanced training for some of the specialized tools.
Snippets
Snippets provide a container to fill information in, and most of the special layout elements you see on our pages are made using snippets.
UHCL snippets include expandable accordions (or drop-down menus), tabs, split columns, block lists, tables, and others.
Assets
Assets are elements that place identical content across multiple pages.
Any time an asset is updated, those changes are automatically updated on all the pages where that asset appears.
For this reason, we typically use assets for information that needs to be widely available and easily updated. Examples include contact information and office hours, university deadlines, campus maps, and other information.
All assets are created and maintained by web coordinators, with the exception of some forms and image galleries.
Modern Campus Support: Omni CMS - Assets
Content
Web Style Guide
For more details on the look and feel of the UHCL website, our Web Style Guide Overview explores the strategy, structure, and elements.
Headings
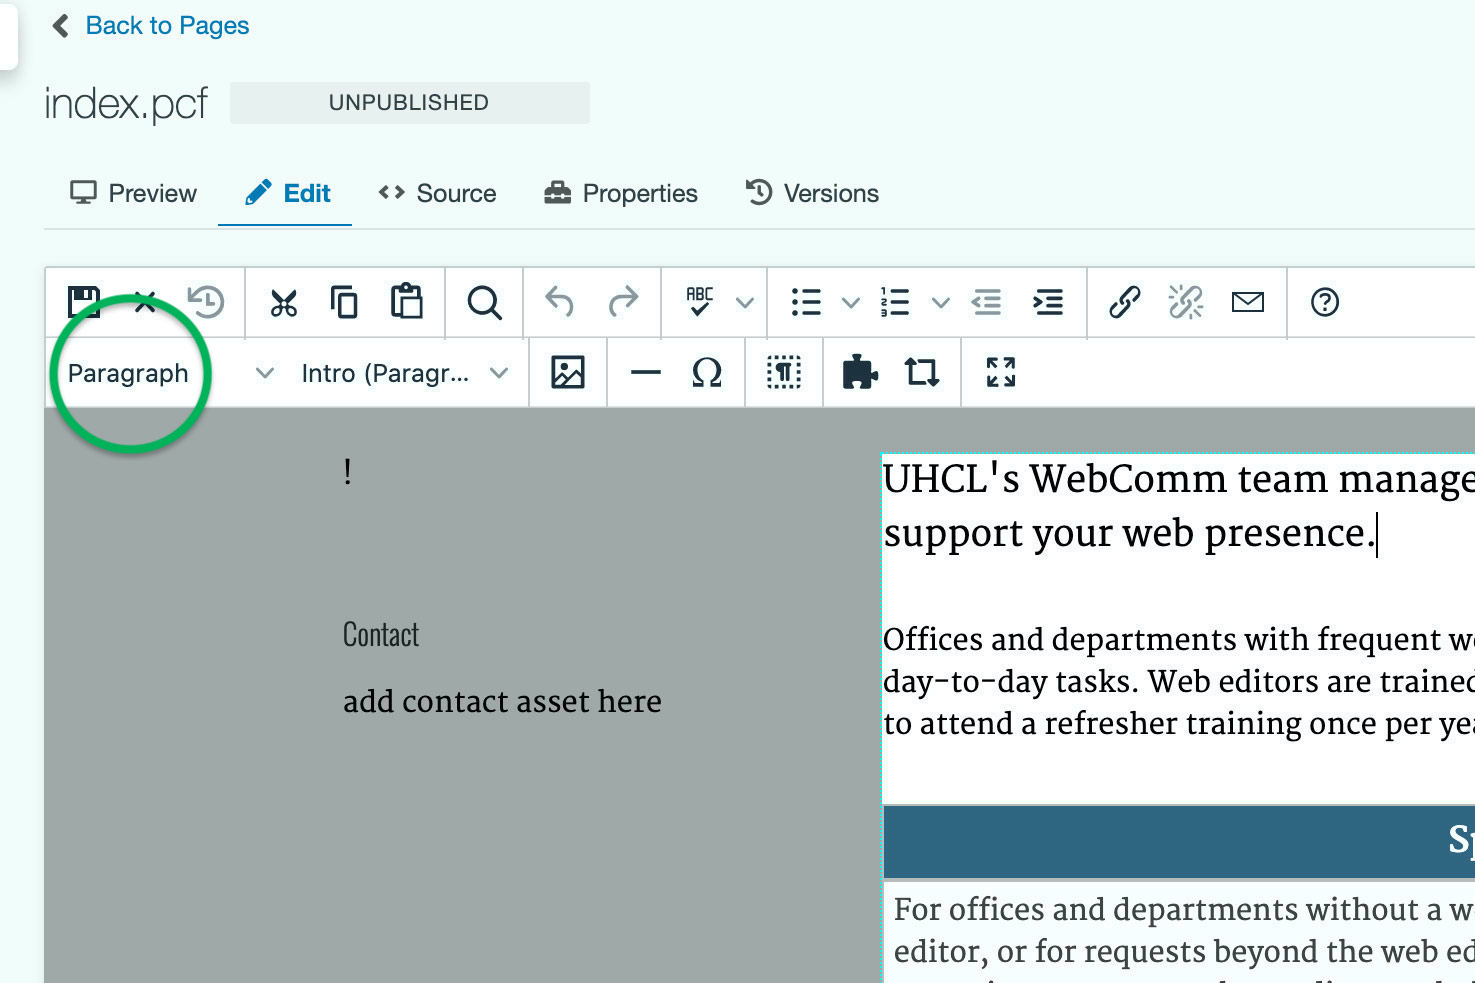
Use headings to help organize the content on your page. Headings are located under the "Paragraph" drop-down menu on the WYSIWYG toolbar.
Heading 1 is reserved for page titles, which are set when pages are created. Typically, you should use Heading 2, Heading 3, or Heading 4.
Headings have an important function for accessibility. Headings should be used in numerical order and with logical nesting, just like the headings on an outline. Pick the right heading for the job based on its number, not based on visual appearance.
Visit our page on Accessible Web Content for more header structure information.
Text
When placing text, paste it without formatting. Then, add formatting such as bold, italics, bulleted lists, or numbered lists using the formatting tools in the WYSIWYG editor.
Pasting in pre-formatted text can cause errors in the code that may not be immediately obvious, but they can impact accessibility.
Links
Link Tool
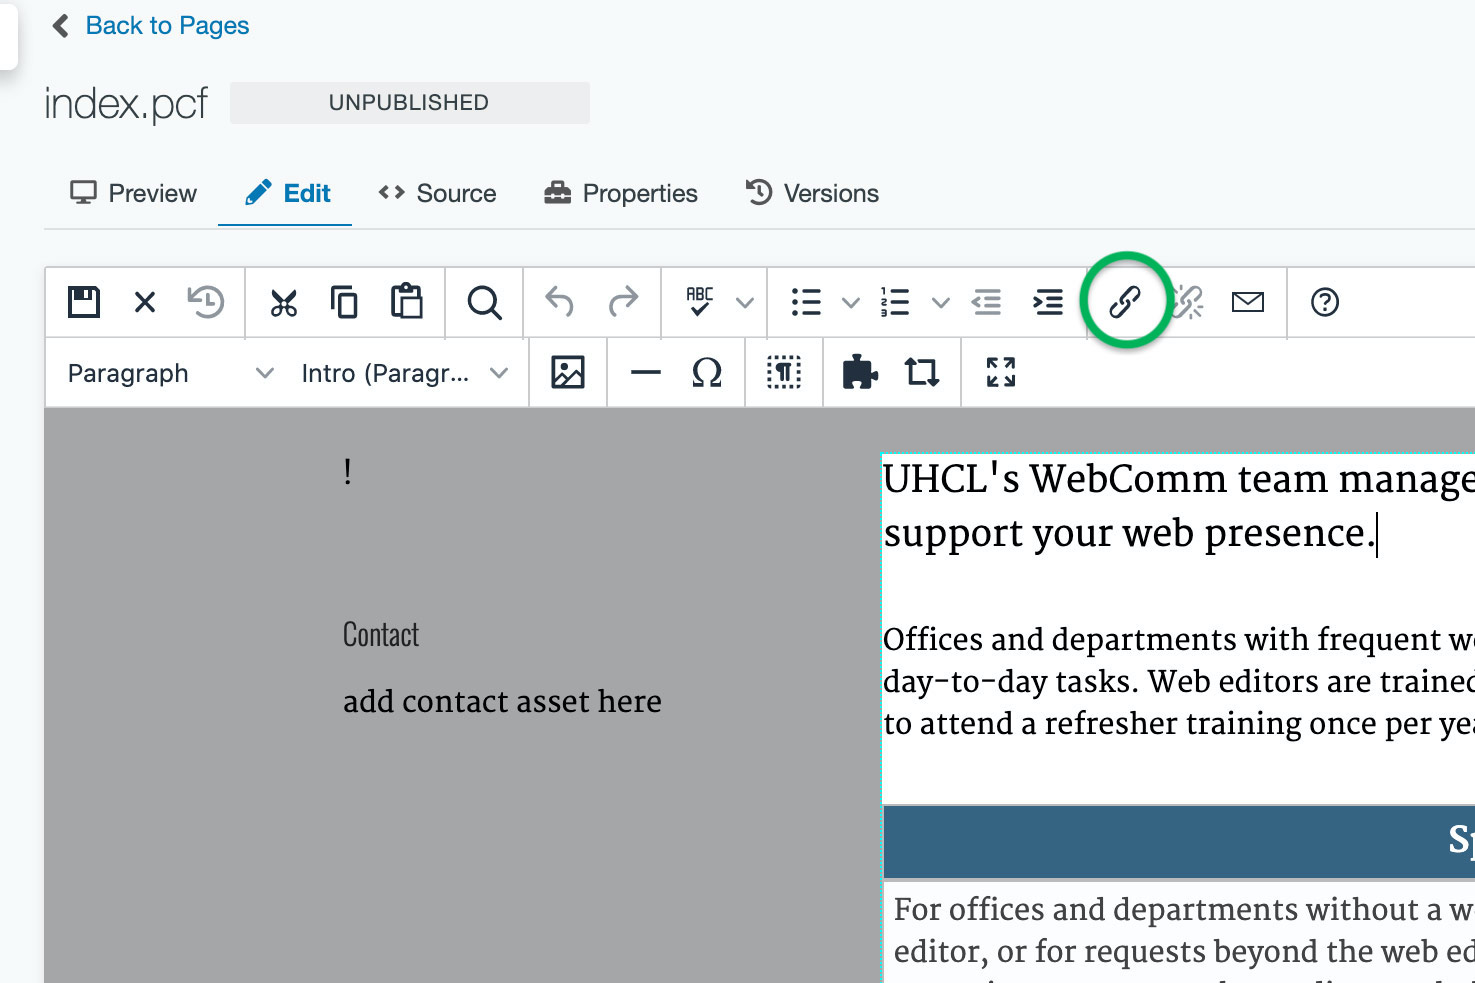
The link tool allows you to add links to another UHCL web page or to an outside URL. With this tool, you can also set the "Text to display" and whether the link will open in the same window or a new one.
To open the link tool, highlight the word or phrase to link and select the "Link" tool from the top toolbar or by right clicking on the selected content.
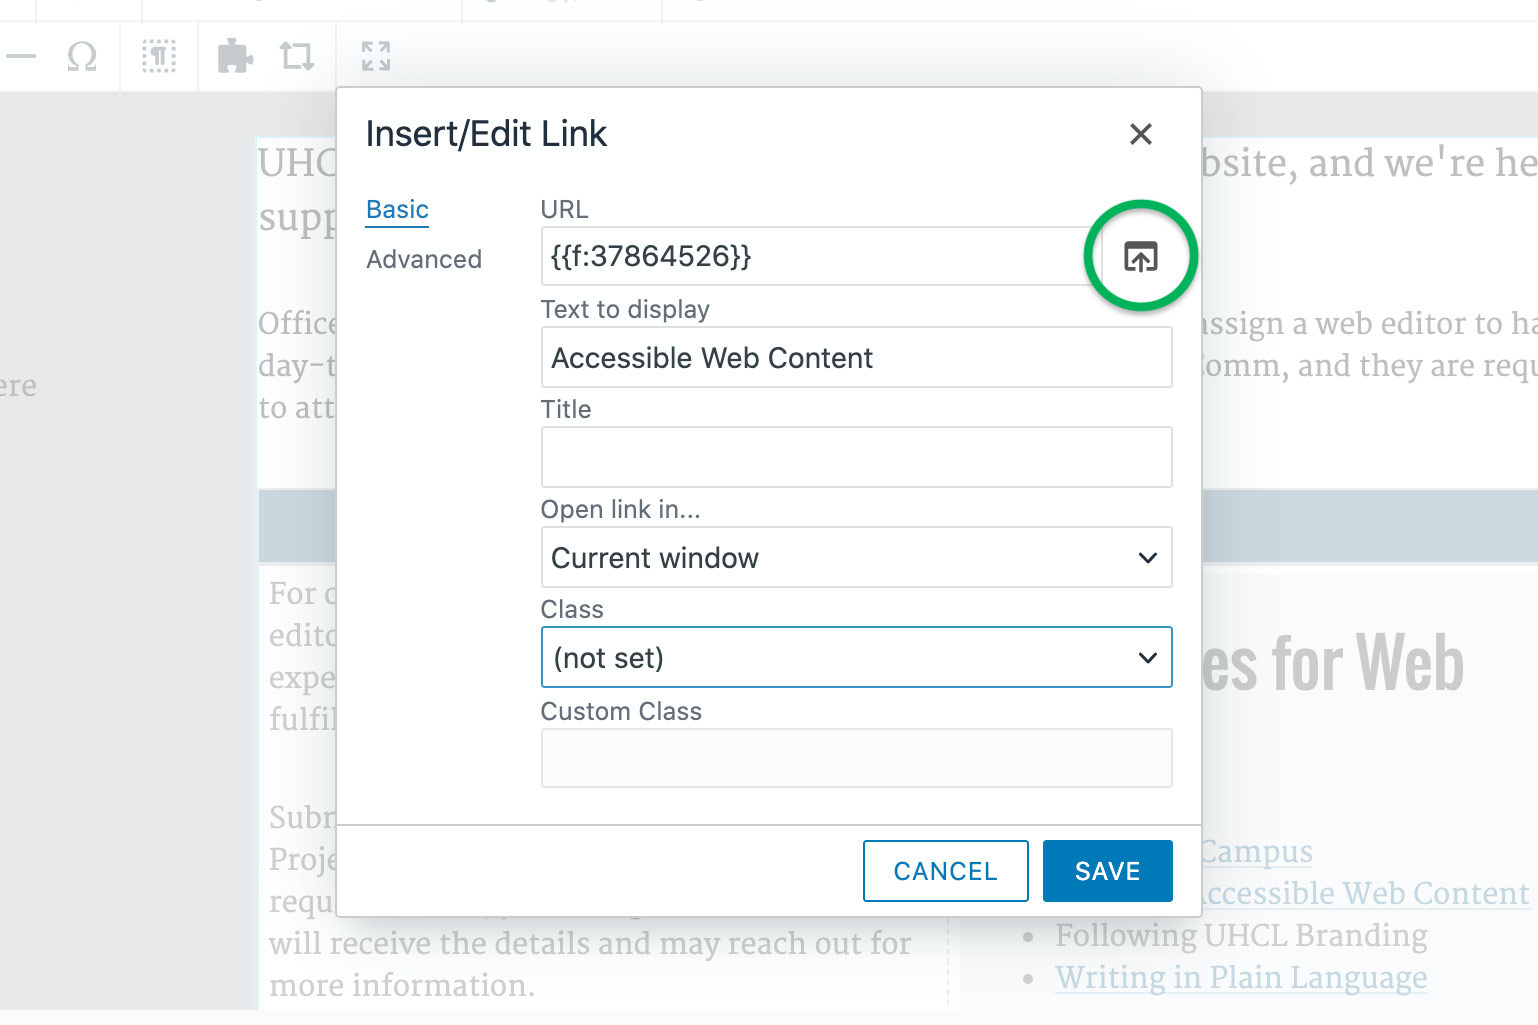
For links to pages on www.uhcl.edu: When linking to a UHCL page with a uhcl.edu address, use the "Source" button to the right of the "URL" field to navigate to the file to be linked. This feature allows Omni CMS the ability to detect pages linked within our site and auto update them if a file is renamed or moved. This is to help prevent broken links on our website.
For links outside of www.uhcl.edu: Paste the external URL into the "URL" field and set the "Open link in..." drop down to "New Window."
Link Display Text
Displayed link text should always be clear and understandable, even when read out of context.
Avoid to help improve accessibility and search engine optimization:
- Generic language alone, such as "Learn More" or "Click Here"
- Using the URL as the displayed link text
Web coordinators will update or ask that you modify links with generic text or that display a full URL.
Button Link Style
You can also use the "Class" drop down menu to change the link's appearance to a button from within the "Edit/Insert Link" settings.
Visit our page on Accessible Web Content for more link information.
Accordions
Accordions are snippets, and you can find them under the "Snippet" button in the WYSIWYG editor (shaped like a puzzle piece).
Accordions can be expanded with additional rows. The "Expand Title" rows should have text only. You can place additional text, images, tables, and other elements inside the "Content Area" rows of the accordion.
Columns
Sample Split Columns:
- Column data
- Column data
- Column data
- Column data
- Column data
- Column data
- Column data
- Column data
The "Split Column" snippet can be placed via the "Snippet" button in the WYSIWYG editor (shaped like a puzzle piece).
It will create two columns of equal width on the page. On small screens, such as phones, the page will display the left column first, then the right column underneath.
Tables
| Column title | Column title 2 | Column title 3 | Column title 4 |
|---|---|---|---|
| 1 Column title | Lorem ipsum dolor sit amet, consectetur adipisicing elit. | 1 Column title | Lorem ipsum dolor sit amet, consectetur adipisicing elit. |
| 4 Column title | Lorem ipsum dolor sit amet, consectetur adipisicing elit. | 1 Column title | Lorem ipsum dolor sit amet, consectetur adipisicing elit. |
| 13 Column title | Lorem ipsum dolor sit amet, consectetur adipisicing elit. | 1 Column title | Lorem ipsum dolor sit amet, consectetur adipisicing elit. |
| 4 Column title | Lorem ipsum dolor sit amet, consectetur adipisicing elit. | 1 Column title | Lorem ipsum dolor sit amet, consectetur adipisicing elit. |
The "Pre-Styled Table" snippet can be placed using the "Snippet" button in the WYSIWYG editor (shaped like a puzzle piece).
This snippet creates a four-column table, and you can adjust the number of columns and rows.
The "Pre-Styled Table" snippet should only be used for data tables, which can include schedules, logs, fee structures, and other organized information. This snippet should not be used for layout or to create a certain "look" to your page.
Every table needs a heading or caption that clearly indicates what the table is about. Tables also require a header column, header row, or both. Each cell should contain only one piece of data.
Visit our Accessible Web Content for additional information on creating accessible tables.
Other Snippets
Other snippets include large images, blockquotes and others. Not all snippets are available to all web editors.
If you don't have access to a snippet you need, submit a MarComm Work Request for assistance from a web coordinator.
Images and Files
Uploading Images and Files
Check out our web style guide on web images for details on how to prepare images for the website.
In UHCL's web environment, we recommend storing images in an "image" folder in your section, and other types of files in a "document" folder in your section. For assistance creating the appropriate folders, contact your web coordinator.
Before uploading a file such as a PDF, Word document, or presentation slide deck, check it for accessibility to ensure all website users can access the information. Our Accessible Web Content page has resources on checking files for accessibility.
The UHCL website is not an archive. All files on the website should be necessary, useful, and current for the UHCL community. Please keep this in mind when uploading new files.
Placing Images
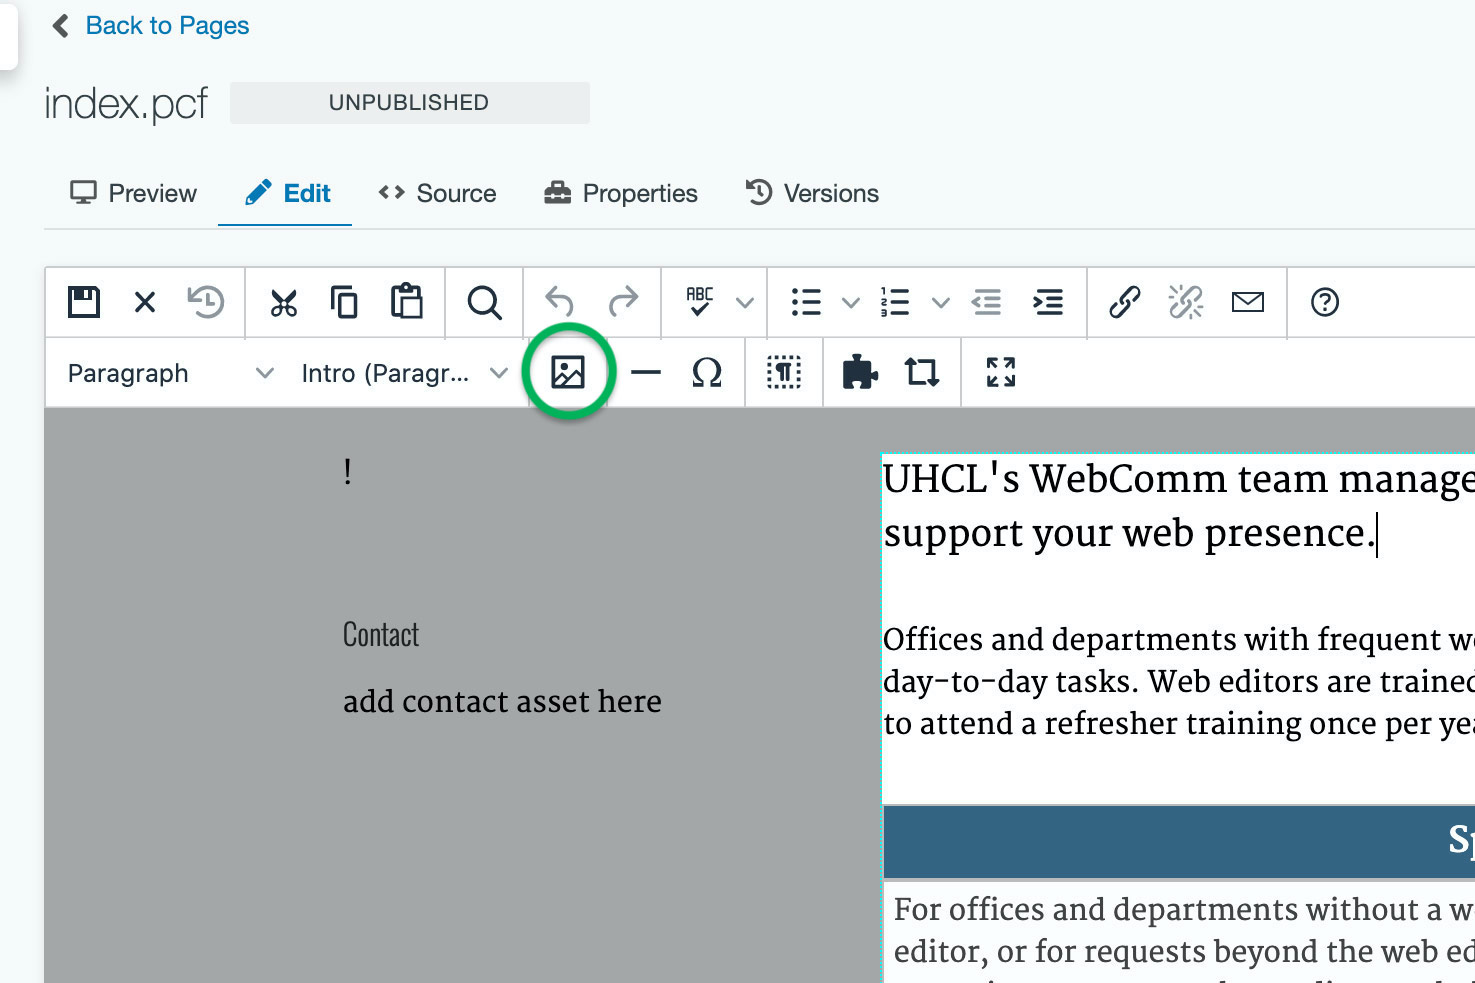
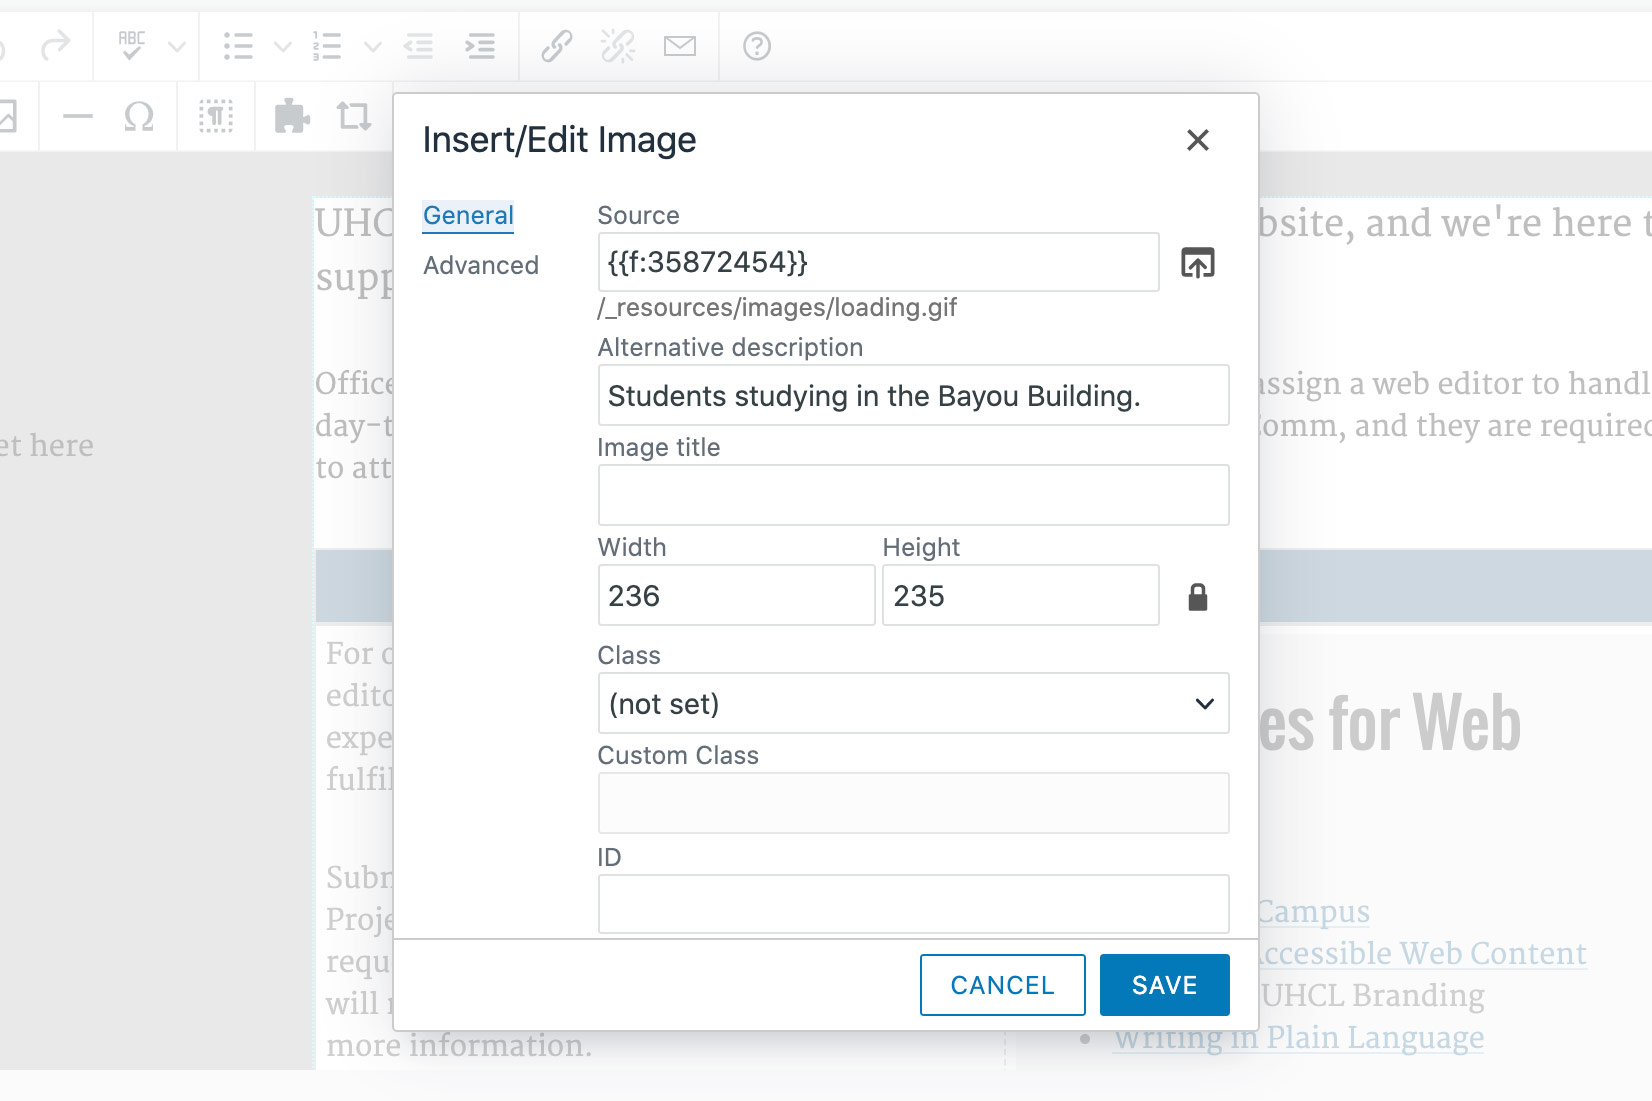
To place an image, use the "Insert/Edit Image" tool in the WYSIWYG editor.
All images must include a brief description in the "Alternative Description" field before they can be placed on the page.
Avoid using images with text in them. However, if text in the image cannot be avoided, be sure all visible text is included in the "Alternative Description." These are important practices for accessibility.
Placing Files
With files, typically you will create a link to the file so users can download it. Use the "Insert/Edit Link" tool in the WYSIWYG editor to link to your file. Click the "Source" button to the right of the URL field to locate your uploaded file.
As with all links, the text should clearly communicate where it links and make sense out of context.
For more information on accessible images and links, visit our page on Accessible Web Content.
Replacing Files
For documents that need to be updated periodically, such as policies, reports, degree plans, or schedules, replacing the file is often more efficient than placing a new one.
To overwrite a document, upload the new file to the same location, use the same file name and extension, and check the "Overwrite Existing" box. This will replace the file on all pages where it has been placed, so be sure the file should be updated everywhere.
Not all web editors have access to overwrite existing files. For assistance, submit a MarComm Work Request with clear instructions on the file replacement.
The UHCL website is not an archive. All files on the website should be necessary, useful, and current for the UHCL community. Overwriting or removing outdated files helps the website better serve our students, faculty, and staff.
Building Image Galleries
Before gaining access to image galleries, you must complete an image gallery training with the Web Team. This is separate from the basic web editor training and is only recommended for web sections that need image galleries created or edited frequently.
If your web section only occasionally needs image galleries added or edited, submit a MarComm Work Request.
Modern Campus Support: Omni CMS - Image Gallery
Web Forms
Creating Forms
We recommend using Microsoft Forms, which is available campus-wide through Office 365. Browse our web form information, or visit the Office of Information Technology's Microsoft Forms page for more information on Microsoft Forms.
Qualtrics is also available university-wide, or your office may have access to other university-approved form systems.
Sharing Forms
Most form tools, including Microsoft Forms, offer multiple ways to share you form.
Web editors can create a direct link to a form. If you need help linking to a form from the UHCL website, please submit a MarComm Work Request.
At this time, the UHCL web team is not embedding forms on UHCL pages.
Publishing
Page Check
Before submitting a page to publish, use the Page Check to evaluate spelling, links, and accessibility. The Page Check is located under the "More Actions" menu. This menu appears as three dots to the right of the "Submit" button above the WYSIWYG editor.
Make any corrections you can to help the approval process go more quickly.
If you find an error that you need help correcting, contact your web coordinator or include a note with your submission.
Submit a Page For Publication: Workflow and Approval
A web coordinator reviews all pages before publication, and some web sections have additional approvers.
To submit a page for publication:
 Click the green "Submit" button in the upper right corner of the page. If you have
uploaded and placed new images or files on the page, OU Campus will submit them for
approval together.
Click the green "Submit" button in the upper right corner of the page. If you have
uploaded and placed new images or files on the page, OU Campus will submit them for
approval together.- Add a brief note listing your updates in the "Message" field.
- Click the "Submit" button after your message.
- Your designated approver(s) will review the page for accessibility errors, spelling errors, broken links, and best web practices.
- You will receive an email from Omni when the approver has made a decision on your page. Check your spam filter or junk folder if it does not arrive.
Once you submit a page, that file is "checked out" to your approver. You cannot make further edits until they approve or decline your submission.
If you realize you need additional changes before the page publishes, work with your approver to determine the best way to address the issue.